Today we will show you how quick and easy it is to deploy a VPS on UpCloud one off the best cloud service provider.
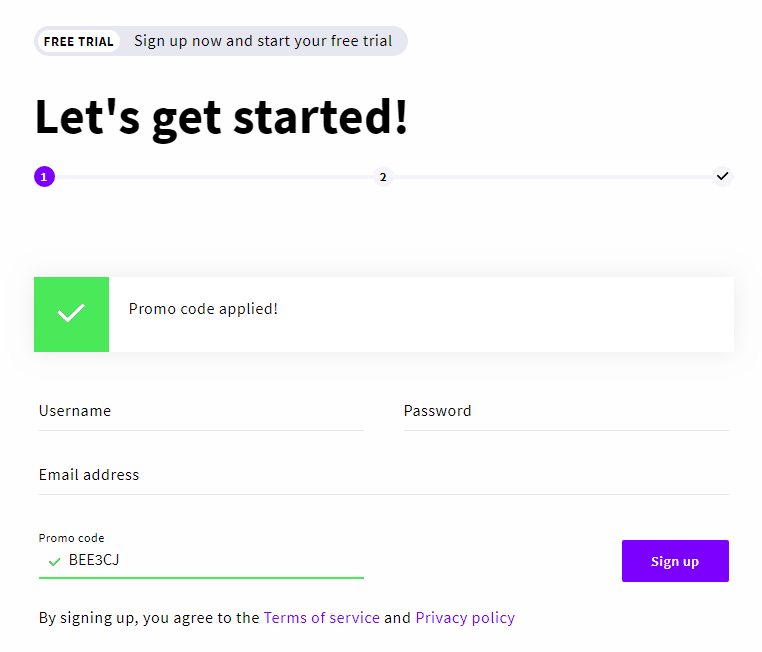
Step 1 – Sing Up
Firstly begin by signing up with UpCloud services. You can follow this referral link or enter promo code “BEE3CJ” and get started with $25 USD bonus credit! Once you’ve signed up for a 3 days trial, you can go ahead and access the site section where you can deploy a server.
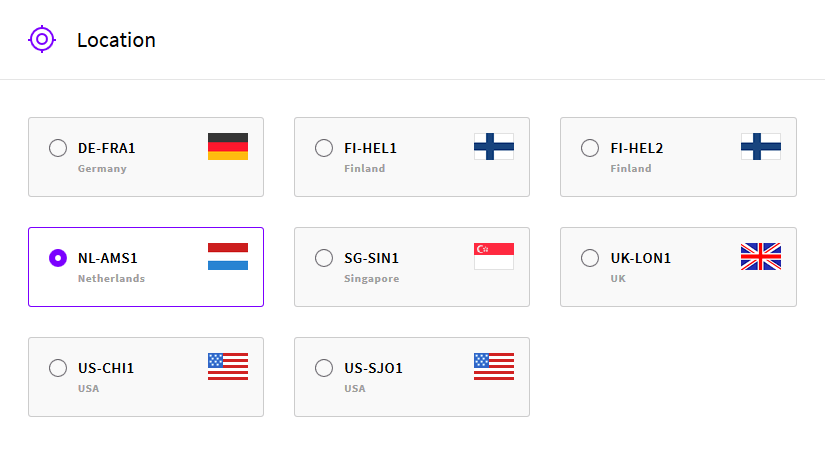
Step 2 – Deploy server

This is how to deploy a VPS:
Choose a location. The best is near you or visitors.
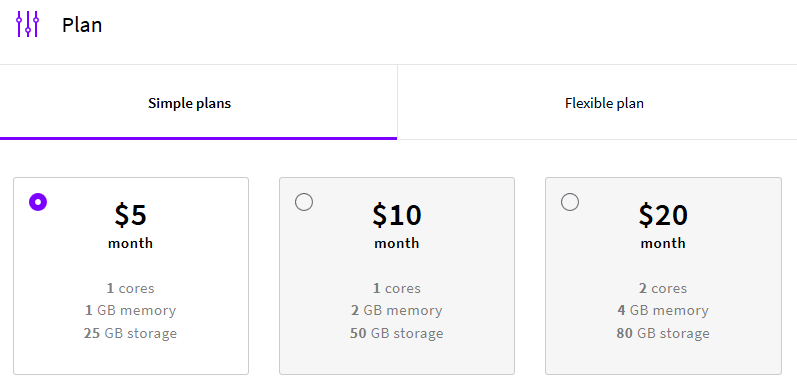
Select a plan. You’ve got everything starting from $5 USD a month for a
Choose an Operating System. If you don’t have Linux OS preferences select CentOS

Down below you can select IPv6 support, We recommend that you do. You have a dropdown underneath that with even more advanced options including how to send your root password, whether access is exclusively SSH keys, password or both.
Skip SSH keys if don’t know how to use them. You will receive a password to access your VPS.
In the end, you get the option of changing the Hostname of your cloud
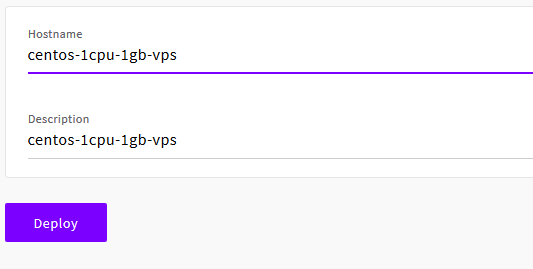
Click Deploy and wait a minute while you VPS is being deployed.
Well done! After a short while, the server will be deployed. You will be provided with the server root password in the notifications panel. The IP and password also should be emailed to your account.
To connect to the server, you will require a program called PuTTY. Download PuTTY here.
Step 3 – Exiting UpCloud Trial Mode
Go to Billing page and you will see Payment options
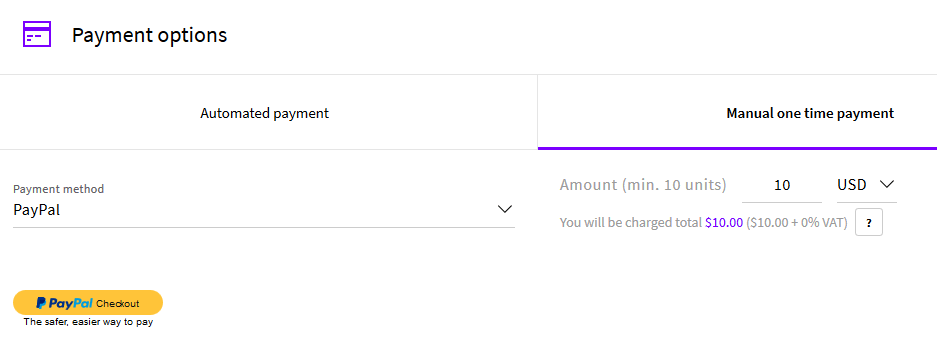
Make manual one time payment or setup automated payment. After $10 deposit your total balance will be $35 and that’s enough using $5 plan for 7 months.
That’s it! Now you can enjoy your cloud VPS and Install your very own VPN in 10 minutes