What is a VPN?
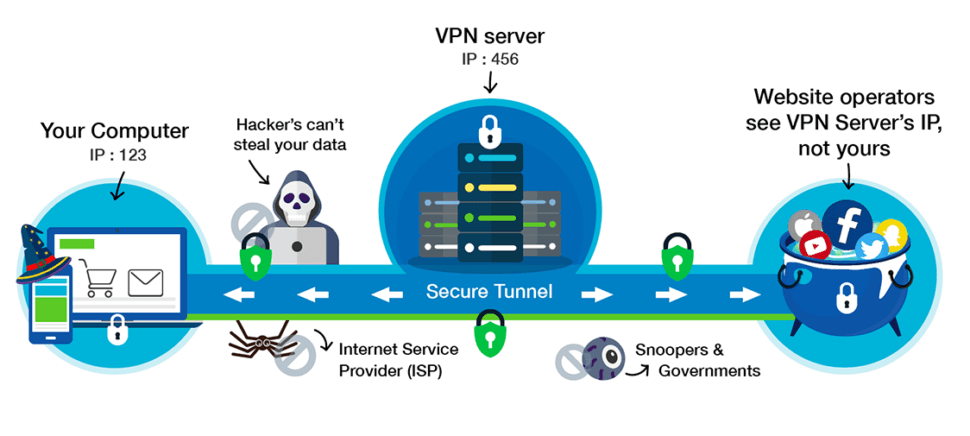
A VPN (Virtual Private Network) is a connection method used to add security and privacy. It lets you access the web safely and privately by routing your connection through a server (VPS), hiding your online actions and a real IP address.
Why do I need my own VPN?
It’s becoming more difficult every day to protect your privacy while browsing online. With more and more services being compromised on a daily basis, it is hard to be assured that your personal browsing data is safe. VPN encrypts your data, even before your Internet Service Provider sees it.
Instead of paying for a VPN provider that keeps logs, you should consider creating your very own VPN server that’s much cheaper and a lot more secure.
Making a personal VPN server is key to maintaining your privacy online. VPN connection is encrypted, and the local network won’t have any idea what sites you are accessing and what data you are sharing. Every time you use a public WiFi network like in a coffee shop or hotel, you have no idea where your browsing data may be routed to.
Is it hard to create my own VPN?
It’s actually really easy to setup your own VPN on a cheap server. It takes only a few minutes to install OpenVPN software. We’ll show you how in this tutorial.
Prerequisites
To setup your own VPN, you will need:
VPS (with a preinstalled CentOS 7). Please follow this tutorial:
How to deploy a VPS (Virtual Private Server) on UpCloud
Don’t forget about a promo code! You will get a very cheap VPS for just $1.43 a month! ($10 for 7 months)
PuTTY. To connect to the server, you will require an SSH program called PuTTY or any ssh program you want to use. Download PuTTY here.
Step 1 — connect to VPS via SSH and PuTTY
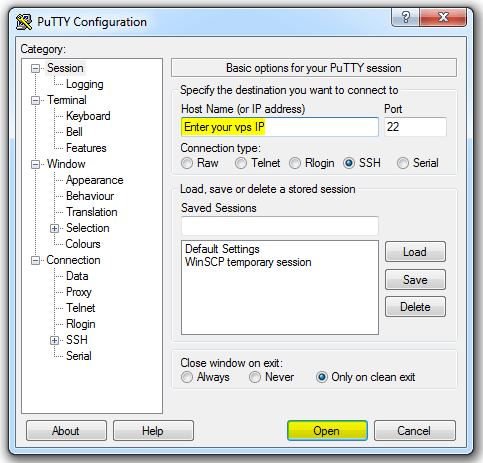
- Open your SSH client, in our case, we’ll use PuTTY.
- Enter your VPS’s IP as Host Name.
- The Port should be 22.
- Then, simply click Open.
- You’ll see a warning screen, where you need to click “Yes” to confirm your access.
- Now, the terminal window will open and you’ll see “login as:“, then simply enter “root” and hit Enter.
- Then you’ll see “[email protected]*your VPS’s IP* password:“. Enter your root’s password. (Note: for security reasons, the password will not be visible when you are entering it)
- Then you should see “[email protected]*VPS hostname* [~]#” and voila! You are now connected!
Step 2 — Installing OpenVPN
To start, we will install OpenVPN on the server. Just copy/paste(right click) commands and hit Enter
yum update -y
wait until it finishes, then paste next command (copy it all, it’s one long command)
wget https://git.io/vpn -O openvpn-install.sh && bash openvpn-install.sh
you will see
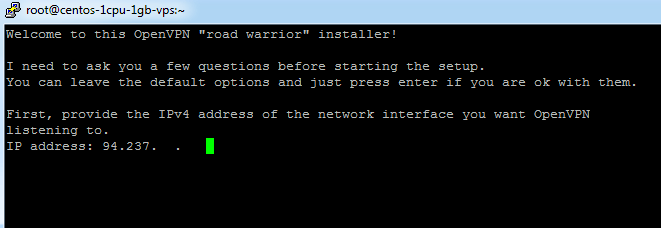
It should show your VPS’s IP. Hit Enter

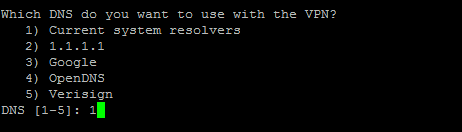
Hit Enter

You should change the default port for security reasons. For example 11111. It has to be easy to remember.

Hit Enter
Hit Enter

You can change it to easily recognize all VPN users in the future. Enter your name or leave as is. Hit Enter

Hit Enter or any key

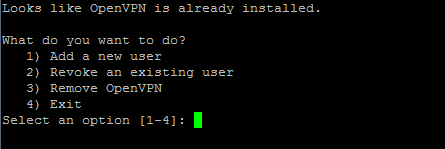
That’s it! Your OpenVPN server is almost ready. If you need to give access to your family members or friends just run the command and add more users or revoke. It’s a good idea to get separate .ovpn file for all your devices if you’re going to use vpn on them at the same time.
bash openvpn-install.sh
Step 3 — Download .ovpn file to your device
Now you need to download .ovpn config file (in our example client.ovpn) from VPS’s /root/ directory. If you’re Windows user get WinSCP. It’s a free SFTP client and FTP client for Microsoft Windows. Copy file between remote servers and a local computer using FTP, FTPS, SCP, SFTP, WebDAV or S3 file transfer protocols.
OR Execute the following command in PuTTY and copy the data into a text file on your computer.
cat /root/client.ovpn
Save the file as client.ovpn (edit command if the name is different)
Step 4 — Get any OpenVPN client
Windows:
On Windows, you will need the official OpenVPN Client which come with a GUI. Place your .ovpn configuration file into the proper directory, C:\Program Files\OpenVPN\config, and click Connect in the GUI. OpenVPN GUI on Windows must be executed with administrative privileges.
macOS:
On macOS, the open source application Tunnelblick provides an interface similar to the OpenVPN GUI on Windows, and comes with OpenVPN and the required TUN/TAP drivers. As with Windows, the only step required is to place your .ovpn configuration file into the ~/Library/Application Support/Tunnelblick/Configurations directory. Alternatively, you can double-click on your .ovpn file.
Android/iOS:
Download from Google Play/App Store
Don’t forget your port number! Some OpenVPN clients may require to enter it manually.
Step 5 — That’s All!
Now you have your very own VPN and don’t have to worry about logs!